Parts Lookup Process for Technicians: Accurate, Fast Ordering
By MDMS Team · 10 August 2026
Parts Lookup Process for Technicians: Accurate, Fast Ordering
The fastest parts lookup process follows three steps: identify the asset using its serial number, PIN, or VIN; validate the part against an EPC or exploded diagram with serial-range confirmation; then order through a supplier channel with a fit-verified quote. Australian workshops that follow this sequence consistently reduce wrong-part returns and cut sourcing time on the bench.
The primary identification methods used across equipment dealerships and fleet workshops are:
- EPC/OEM portals (e.g., John Deere ANZ parts portal, New Holland ANZ portal, or Microcat-style EPCs) for serial-range-driven diagram lookups
- VIN/PIN decoding for machine-specific configuration matching
- Exploded parts diagrams for visual assembly cross-referencing
- Photo/AI visual search for candidate narrowing when identifiers are missing
- Supplier marketplace broadcast (PartsSearch-style) for multi-quote sourcing
Moderndms integrates all five methods into a single dealer management workflow, connecting asset registers, EPC links, supplier quoting, and PO generation without switching between systems.
Quick field checklist (memorize these three steps):
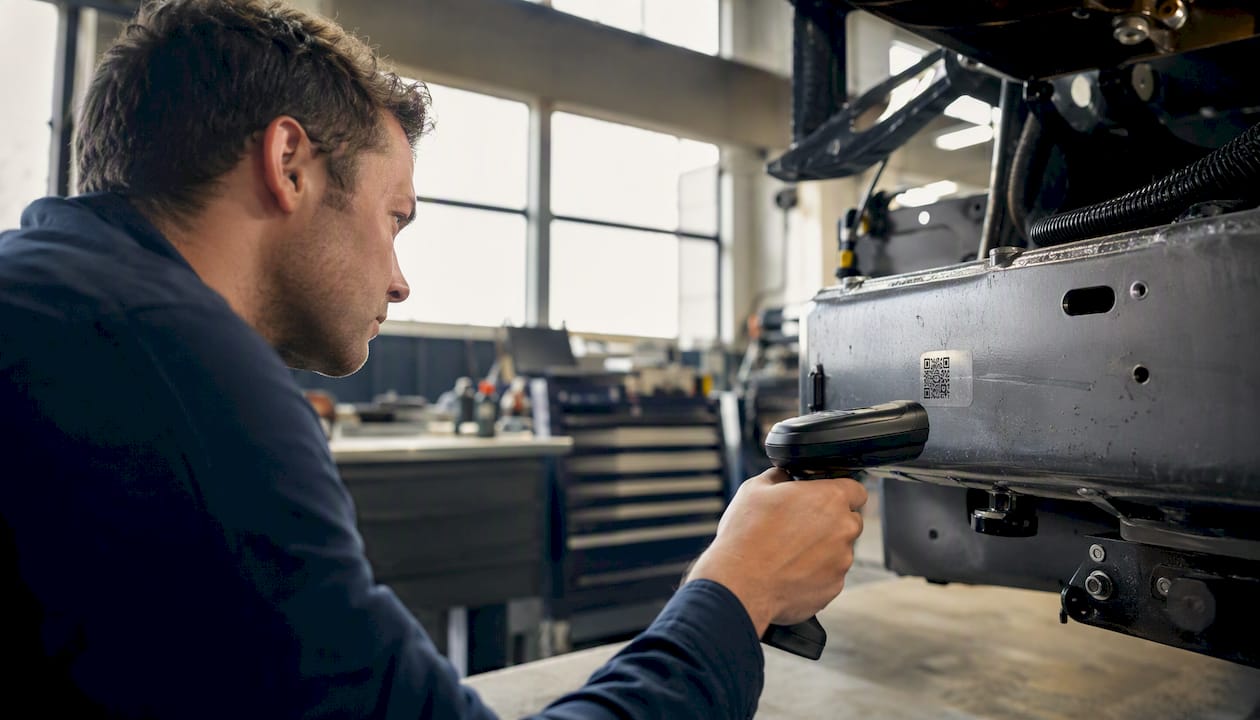
- Capture the asset ID, serial number/PIN, and VIN before touching anything else
- Photograph the data plate, the part in-situ with a ruler, and any connectors or mating interfaces
- Run one EPC or VIN check and confirm the serial range before requesting a quote
Pro Tip: Always confirm the serial-range or revision code in the EPC before placing an order. Two machines with identical model names can require completely different parts if their serial numbers fall in different production ranges.
Key Takeaways
A reliable parts lookup process requires verified identifiers, serial-range confirmation in the EPC, and a fit-verified supplier quote before any order is placed.
| Point | Details |
|---|---|
| Capture identifiers first | Serial number, PIN, VIN, and photos must be collected at the machine before any catalog search begins. |
| Serial range determines fit | The same diagram position can map to multiple part numbers; always confirm the serial range in the EPC before ordering. |
| Pair identification methods | Confirm any AI or photo match against the EPC serial range; never order on a single unverified method. |
| Validate before high-value orders | For parts over AU$500 or with lead times over five business days, require a supplier photo of the part number before dispatch. |
| Moderndms integrates the full workflow | The Moderndms asset register, EPC links, parts module, and purchasing tools connect lookup to order in one auditable system. |
Table of Contents
- What does the parts lookup process look like step by step?
- What information should you collect before starting a lookup?
- Which identification methods and platforms work best for Australian workshops?
- How do you read exploded diagrams and apply serial-range logic?
- What mistakes cause wrong-part orders, and how do you prevent them?
- How should you structure the ordering workflow and asset tagging?
- How does automation speed up parts lookup, and where does human review still matter?
- How Moderndms implements a best-practice parts lookup workflow
- What habits and culture changes actually save time on lookups?
- Moderndms runs your parts lookup, quoting, and ordering from one dashboard
- Sources
- FAQ
What does the parts lookup process look like step by step?
A structured lookup runs from job confirmation through to parts receipt. Each step has defined inputs, a responsible role, and a time expectation. Skipping a step is where wrong-part orders originate.
-
Confirm asset and job context (Parts desk or field tech, 2–3 minutes) Input: work order, customer asset ID, job description. Verify the machine is the one on the order and that the fault description matches the part category you are about to search.
-
Capture identifiers and photos (Field tech, several minutes) Input: serial number/PIN, VIN, engine code, option codes, data plate photos, part in-situ photos with scale. Record everything before disassembly; reassembly orientation is easy to lose.
-
Check EPC, VIN, or PIN (Parts desk, a few minutes) Input: serial/PIN from step 2. Modern EPC systems support searching by description, part number, VIN, or PIN and return high-resolution exploded diagrams. Serial ranges are the primary driver for compatibility, not model name alone.
-
Cross-check exploded diagram and serial range (Parts desk, a few minutes) Input: diagram reference number, serial range, option codes. Confirm the diagram position maps to the correct OEM part number for this machine’s production run. Check supersession entries.
-
Broadcast request or place order (Parts desk, several minutes) Input: verified OEM part number, machine/job reference, photos. Marketplace platforms like PartsSearch can broadcast a VIN-based request to a supplier network, return multiple quotes, and let your team pick by price, condition, and lead time.
-
Verify delivery and log (Parts desk or warehouse, a few minutes) Input: delivery docket, OEM part number on packaging. Confirm the received part number matches the order. Log the serial number of the received part against the work order and asset record.
Tablet/phone checklist for field use:
- [ ] Work order confirmed and asset verified
- [ ] Serial/PIN, VIN, and engine code captured
- [ ] Data plate and in-situ photos taken
- [ ] EPC/VIN check completed with serial range confirmed
- [ ] OEM part number recorded and diagram reference noted
- [ ] Supplier quote received and fit confirmed
- [ ] Delivery checked against order; part logged to asset record
Pro Tip: Escalate to a parts specialist when diagrams are ambiguous, serial ranges are missing from the EPC, or the part is discontinued. A specialist lookup service collects machine details, confirms the part range for the serial, and prepares a purchase quote — saving hours of back-and-forth.
What information should you collect before starting a lookup?
The quality of a parts lookup is almost entirely determined by what you collect in the field before you open a catalog. Incomplete data forces multiple lookup cycles, each one burning time.
Essential identifiers to capture:
- Equipment model (full model designation, not just the common name)
- Serial number or PIN (from the chassis tag, not the operator manual)
- VIN (for on-road or dual-registered machines)
- Engine code or engine serial number (critical for powertrain parts)
- Option codes or build codes (these determine which variant of a part fits)
- Asset ID as it appears on the chassis tag or fleet register
Photos to take at the machine:
- Data plate close-up (full frame, no glare, with flash if needed)
- Part in-situ with a ruler or tape measure for scale
- Mating interfaces: flanges, mounting faces, and bolt patterns
- Connector and pin orientation for any electrical components
- One wide “context” photo showing the machine’s orientation and the part’s location on it — parts desks use this to confirm installation environment before quoting
Measurements to record when the part is not in an EPC:
- Overall length and key cross-section dimensions
- Mounting hole center distances
- Thread sizes (pitch and diameter)
- Spline count and spline form
- Critical clearances where interference fit matters
For wear parts on mining and earthmoving machinery, the wear position and lock system type drive the correct part number more than the machine model alone. Attaching a photo with a ruler and a note of the lock system to the PO reduces supplier back-and-forth and produces a correct fit the first time.
Data hygiene tips:
- Photograph serial plates rather than transcribing them; OCR errors on stamped characters (0 vs. O, 1 vs. I) cause lookup failures
- Use a consistent filename convention:
[AssetID]_[Date]_[PartLocation]so photos are retrievable later - Transcribe VIN/PIN to a text field immediately after photographing to catch any misread characters
Pro Tip: The “context” photo is the one most technicians skip and parts desks most often request. Take it before you remove anything. A single wide shot showing the machine, the work area, and the part’s position saves a phone call and often resolves ambiguity about which variant is installed.
Which identification methods and platforms work best for Australian workshops?
Each identification method has a different entry requirement and a different risk profile. Knowing which one to try first, given the data you have, is what separates a 10-minute lookup from a 45-minute scavenger hunt.
Primary methods at a glance:
- EPC/OEM portals (Microcat, John Deere ANZ, New Holland ANZ): search by serial/PIN, model, or part number; return exploded diagrams with serial-range filtering
- VIN/PIN decoding: machine-specific configuration lookup; confirms which options and variants were factory-fitted
- Exploded diagrams: visual assembly cross-reference; requires knowing the assembly group first
- Photo/AI visual search: candidate narrowing from images; fast but requires human validation before ordering
- Supplier marketplace broadcast (PartsSearch): single request to multiple suppliers; returns quotes with price, condition, and lead time
| Identification method | Required input data | Accuracy / risk of wrong fit | Speed | Ordering channel | Supplier lead time and warranty |
|---|---|---|---|---|---|
| EPC/OEM portal (Microcat, OEM-specific) | Serial/PIN, model, part description | High when serial range confirmed; medium without serial range | a few minutes | OEM dealer, authorized distributor | OEM warranty; lead time varies by stock |
| VIN/PIN decoding | VIN or PIN from chassis tag | High; confirms factory configuration | 2–4 min | OEM dealer or EPC-linked supplier | OEM warranty; typically same-day to 5 days |
| Exploded diagram cross-reference | Assembly group, diagram ref number | Medium; must confirm serial range separately | several minutes | OEM or aftermarket | Depends on channel; aftermarket may lack warranty |
| Photo/AI visual search | Clear photo, ideally with scale | Low to medium; false positives on worn parts | a few minutes (candidate list) | Requires EPC confirmation before ordering | N/A until validated |
| Supplier marketplace broadcast (PartsSearch) | OEM part number or VIN | Medium to high when OEM number supplied | several minutes for quotes | Multiple suppliers; select by price and lead time | Varies by supplier; confirm per quote |
Machine-vision AI can narrow candidate parts from images and CAD datasets, improving identification speed, but it requires human verification before ordering to avoid false positives on worn or non-standard parts.
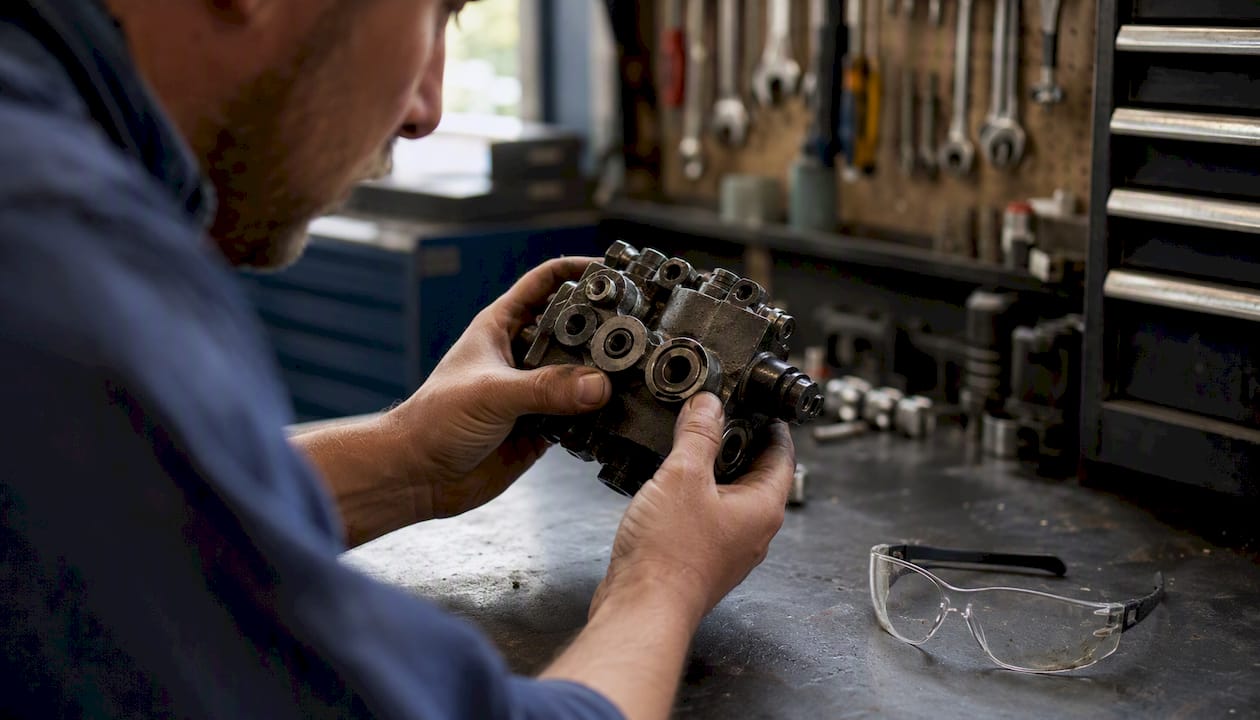
When you have a VIN or PIN, start with the EPC or VIN decode. When you have only a photo, use AI as a candidate filter and then confirm in the EPC before touching the order. For aftermarket equivalents, start from the OEM part number in the OEM catalog, then cross-reference in aftermarket catalogs and verify spec (alloy grade, filter efficiency, hose ratings) rather than assuming fit.
Pro Tip: Pair methods rather than relying on one. An AI photo match that is not confirmed against the EPC serial range is a guess, not a verification. Run both, and only proceed to order when both agree.
How do you read exploded diagrams and apply serial-range logic?
Exploded diagrams are organized by assembly group, not by part number sequence. Each diagram position carries a reference number (sometimes called a “callout” or “item number”) that maps to an OEM part number in the parts list alongside the diagram. Those two numbers are not the same thing, and confusing them is one of the most consistent sources of wrong-part orders.
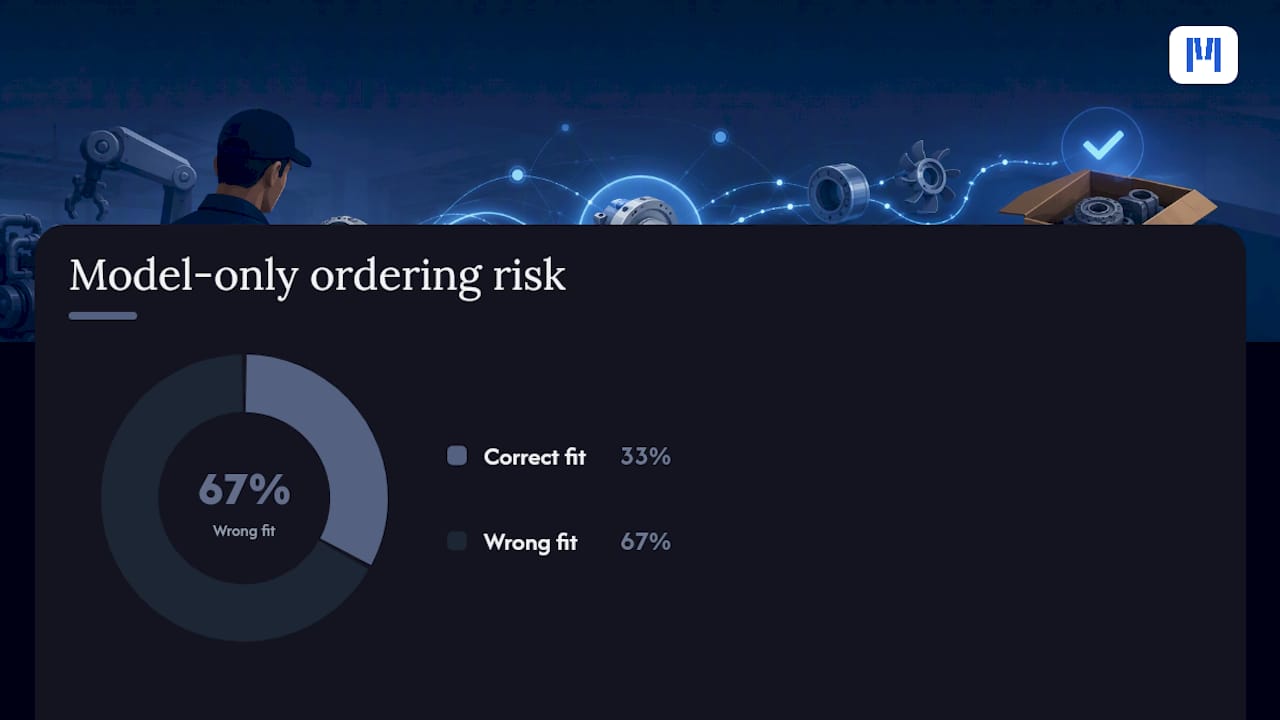
The serial-range column in that parts list is where the real work happens. A single diagram position can map to three or four different OEM part numbers depending on the machine’s serial number. Production changes, running design improvements, and option-code variants all create these splits. Modern EPC systems handle this by filtering the parts list to the serial range you enter at login, but if you browse without entering a serial, you see all variants and must select manually.
Step-by-step micro-workflow for diagram use:
- Identify the assembly group (e.g., “hydraulic pump assembly,” “front axle hub”)
- Locate the diagram position that corresponds to the part you need
- Read the diagram reference number (item number) for that position
- Cross to the parts list and find the OEM part number that matches your machine’s serial range
- Check the “superseded by” or “replaced by” column — older part numbers are often superseded by a current number
- Note any fit notes or revision codes before recording the final OEM part number
Serial-range example: A hydraulic cylinder seal kit at diagram position 14 might list three part numbers: one for serials up to 50000, one for 50001–75000, and one for 75001 onward. The kits are dimensionally different. Ordering by model name alone, without the serial range, gives you a one-in-three chance of the right fit.
Pre-order diagram checklist:
- Confirmed the correct assembly group (not just the nearest-looking diagram)
- Matched diagram reference number to OEM part number in the parts list
- Verified serial range applies to this machine’s serial number
- Checked supersession column for current part number
- Noted any revision codes or fit notes in the parts list
Pro Tip: When a diagram shows a subassembly as a single item (e.g., “cylinder assembly”), check whether the EPC also lists individual components within it. Ordering the full assembly when only a seal or a pin has failed is a common and expensive mistake.
What mistakes cause wrong-part orders, and how do you prevent them?
Wrong-part orders almost always trace back to one of five failure modes. Each has a specific prevention step.
The five most common lookup mistakes:
- Ordering by visual resemblance. Two parts that look identical can have different thread pitches, alloy grades, or seal materials. Visual match is not fit confirmation.
- Ignoring serial-range or revision differences. As covered above, the same diagram position can map to multiple part numbers across a production run.
- Unreadable or missing asset tags. A corroded or missing serial plate forces guesswork. Without the serial number, EPC serial-range filtering is impossible.
- Transcribed VIN/PIN errors. A single transposed digit sends the EPC lookup to the wrong machine configuration.
- Assuming aftermarket cross-reference equals fit. An aftermarket catalog cross-reference means the supplier believes the part is equivalent, not that it has been verified against OEM spec. Alloy grade, filter efficiency, and hose pressure ratings can differ.
Validation checklist before placing any order:
- Confirm serial number range in the EPC matches this machine’s serial
- Cross-check with VIN decode where the machine has a VIN
- Request a photo of the supplier’s stock part showing the part number on the packaging or the part itself
- Confirm OEM vs. aftermarket spec and the warranty terms
- For high-cost or long-lead items, require a fit-verification photo before the supplier ships
When an online search fails, a specialist lookup service adds a validation layer: specialists collect machine details, confirm the part range for the serial, and prepare a purchase quote. This is the right escalation path for ambiguous diagrams, missing serial ranges, or discontinued parts.
On wrong-part returns: Every return costs time in repackaging, freight, and rebooking the job. The validation checklist above is not bureaucracy; it is the fastest path to a correct first-time fit.
Pro Tip: For any part with a lead time over five business days or a unit cost above AU$500, require a fit-verification step: ask the supplier to photograph the part number on their stock item or OEM packaging before dispatch. This single step eliminates the most expensive category of wrong-part returns.
How should you structure the ordering workflow and asset tagging?
Getting the order right is the last step where errors can still be caught. Asset tagging is what makes every future lookup faster.
Ordering workflow:
- Prepare the purchase order with the machine reference, job number, and work order ID
- Attach the OEM part number, serial-range confirmation, and in-situ photos to the PO
- Request supplier confirmation of fit before dispatch (not just acknowledgment of order)
- Track delivery against the expected lead time; flag delays to the workshop scheduler
- On receipt, check the part number on packaging against the PO; log the received serial or batch number against the asset record
The MDMS purchasing module supports attaching photos and job references directly to POs, so the fit-verification evidence travels with the order rather than sitting in an email thread.
Final pre-order checklist:
- [ ] OEM or aftermarket spec confirmed and documented
- [ ] Serial-range match verified in EPC
- [ ] Supplier lead time and warranty terms recorded
- [ ] Return policy confirmed for high-value items
- [ ] Shipping method selected and delivery date logged to work order
Asset tagging best practices:
Durable tags made from stainless steel or anodized aluminum with engraved text and a QR code are the standard for equipment operating in harsh Australian conditions. Adhesive labels and plastic tags fail in UV, heat, and chemical exposure. Mount the tag on the chassis or a structural frame member, never on a panel or component that is regularly removed.
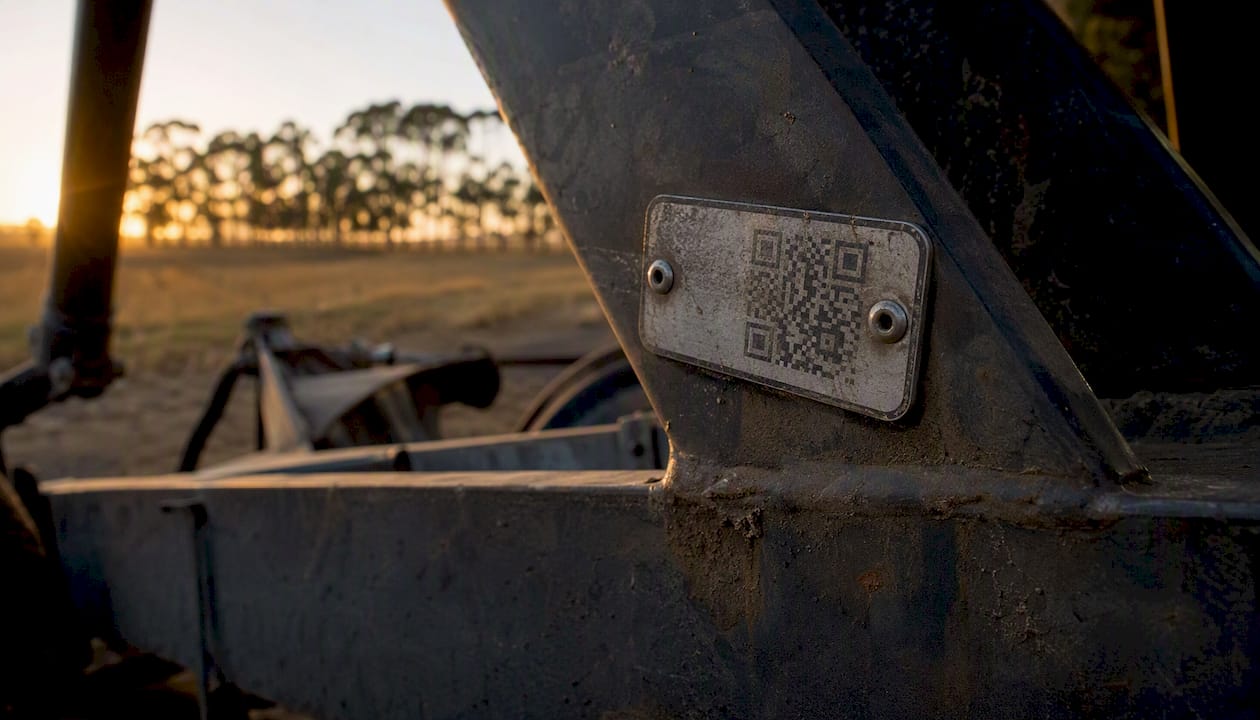
Mandatory tag fields: asset ID, serial number, model designation, and a QR code linking to the asset record. Optional but useful: commissioning date and dealer contact.
Tag application checklist:
- [ ] Tag material confirmed (stainless or anodized aluminum)
- [ ] All mandatory fields engraved or laser-marked (not printed)
- [ ] QR code tested and links to correct asset record
- [ ] Tag mounted on chassis, not on a removable component
- [ ] Sample tag approved before batch production
Pro Tip: Scan the QR tag into the CMMS or Moderndms asset register at commissioning and attach the first data-plate photo at that point. Every future lookup for that machine then starts with a scan, not a search.
How does automation speed up parts lookup, and where does human review still matter?
Automation handles the repetitive, data-retrieval steps well. Human judgment is still required wherever fit depends on context that a system cannot see.
Automation patterns that reduce lookup time:
- Auto-lookup on job booking: when a work order is created with an asset ID, the system pre-populates the asset’s serial, model, and last-known parts list from the asset register
- Pre-populated cart from historic jobs: repeat service jobs on the same asset can suggest the parts used last time, reducing lookup to a confirmation step
- Supplier-broadcast for quotes: platforms like PartsSearch broadcast a single parts request to a supplier network and return multiple quotes, letting your team compare price, condition, and lead time without contacting each supplier individually
AI/photo identification: strengths and limits:
Machine-vision AI is useful for candidate narrowing and OCR of stamped or embossed part numbers on worn components. Its limits are real: visually similar parts (same family, different revision) produce false positives, and heavily worn or corroded parts reduce recognition accuracy significantly.
Required human verification gates:
- Serial-range check in the EPC after any AI-suggested match
- Supplier photo confirmation for high-value or long-lead parts
- OEM technical service bulletin lookup for any part flagged as superseded
- Manual review of any AI match that falls below the system’s defined confidence threshold
Maintain an exceptions queue for AI-suggested matches that fail a confidence threshold. A parts desk that reviews this queue daily catches systematic errors before they become a pattern of wrong-part orders.
Pro Tip: Automation should pause and flag for manual review whenever the AI confidence score is below your defined threshold, the part is superseded, or the serial range in the EPC does not match the asset’s serial. Build those three triggers into your workflow rules from day one.
How Moderndms implements a best-practice parts lookup workflow
A dealer management system that connects the asset register, EPC links, parts desk, and supplier ordering in one place removes the biggest source of lookup errors: data re-entry between disconnected tools.
Moderndms features that support the lookup process:
- Asset register with QR/serial scanning: scan a tag at the machine and the asset record opens with serial, model, option codes, and full part history
- EPC integration links: jump from the asset record directly to the relevant OEM portal with machine identifiers pre-filled
- Parts and warehouse management: manage stock levels, bin locations, and part supersessions from the same platform used to run the lookup
- Supplier quote broadcast and PO generation: send a parts request to multiple suppliers, compare quotes, and generate a PO with machine and job references attached
- Audit trail for orders: every lookup, quote, and order is logged against the work order and asset record, so warranty claims and return disputes have a clear evidence chain
How Moderndms maps to the six-step workflow:
| Workflow step | Moderndms module | Benefit |
|---|---|---|
| Confirm asset and job context | Asset register, work order | Asset details pre-populated from serial scan |
| Capture identifiers and photos | Mobile app (offline-capable) | Photos attach directly to the work order |
| Check EPC/VIN/PIN | EPC integration links | Machine identifiers pre-fill the EPC session |
| Cross-check diagram and serial range | Parts and warehouse module | Supersession and serial-range notes stored in-system |
| Broadcast request and place order | Purchasing module | PO generated with photos and job reference attached |
| Verify delivery and log | Warehouse receipt, asset register | Received part number logged to asset history |
Moderndms also integrates with Xero for GST-compliant invoicing, so the PO-to-invoice cycle closes without manual re-entry. The modular rollout means a dealership can start with parts and warehouse, then add service workshop or rental fleet as the team’s confidence grows.
Pro Tip: Use the Moderndms dealer suite asset register to store a scanned copy of the data plate photo at commissioning. When a technician scans the QR tag on a job two years later, that photo is already there, and the lookup starts with verified identifiers rather than a field search for a corroded plate.
What habits and culture changes actually save time on lookups?
The workflow described in this guide works on paper. Whether it works on shift depends on role clarity, short SOPs, and a feedback loop that catches errors before they become habits.
Role clarity: who owns each step
Field technicians own identification: they capture the serial, PIN, photos, and measurements. The parts desk owns validation: they run the EPC check, confirm serial ranges, and manage supplier contact. A senior parts specialist or service manager owns escalation: ambiguous diagrams, discontinued parts, and high-value fit verification. When these boundaries blur, steps get skipped and accountability disappears.
SOPs that technicians actually follow
A one-page laminated field card covering the three-step capture sequence (identifier, photos, measurements) is more effective than a 20-page procedure manual. Pair it with a five-minute onboarding walkthrough on the first job and a monthly review of wrong-part return causes. High-performing shops use automated documentation tools to convert their field workflows into living SOPs that update as the process improves, rather than letting a PDF go stale in a shared drive.
Practical habits from high-performing workshops
Mandatory photo attachment on every work order is the single habit with the highest return. Shops that enforce it report fewer supplier disputes and faster warranty claims because the evidence already exists. A weekly parts accuracy review, where the parts manager reviews the previous week’s returns and flags the root cause (wrong serial range, visual match, transcription error), closes the feedback loop and prevents repeat errors.
The shift from “look it up when you need it” to “capture everything at the machine” is the cultural change that makes the rest of the workflow possible. It takes about three weeks of consistent reinforcement to become automatic.
Moderndms runs your parts lookup, quoting, and ordering from one dashboard
Wrong-part returns and slow sourcing cycles usually share a common cause: data living in too many places. Moderndms solves that by connecting the asset register, parts desk, supplier quoting, and PO generation in a single platform built for Australian equipment dealerships.
The practical difference is measurable. Your team scans a QR tag, the asset record opens with serial and model pre-filled, the EPC link launches with those identifiers already loaded, and the resulting PO carries photos and job references without anyone retyping anything. Moderndms users report saving up to 10 hours per week in administrative tasks across the dealership. The parts and warehouse module handles stock, supersessions, and supplier quotes in the same session as the lookup.
Setup takes under an hour. There is no lock-in: monthly rolling contracts and full data ownership mean you are not committed beyond the value you receive. Xero integration keeps GST compliance clean without a separate accounting workflow.
If your team is managing lookups across spreadsheets, email threads, and disconnected portals, request a demo of Moderndms for equipment dealers and see the lookup-to-order workflow running live.
Sources
OEM and EPC portals:
- How TVH’s look‑up service guarantees you the parts you need | TVH Australia
- Repairer Parts Finder – AI‑Powered Auto Parts Sourcing for Mechanics & Repairers
- Custom equipment ID tags | Evright Industrial
Marketplace and supplier tools:
Asset tagging and physical identification:
When to contact an OEM rep or lookup service:
FAQ
How do you look up OEM parts by serial number?
Enter the machine’s serial number or PIN into the OEM’s EPC portal (such as the John Deere ANZ parts portal or a Microcat-based system). The EPC filters the parts list to the serial range that applies to your machine and returns the correct OEM part numbers with exploded diagrams.
Can AI identify a part from a photo?
Yes, machine-vision AI can narrow candidate parts from images trained on part photos and CAD data, and it can OCR stamped numbers on worn components. Human verification against the EPC serial range is required before ordering, because visually similar parts in the same family produce false positives.
What is a supplier broadcast quote and how does it work?
A supplier broadcast sends a single parts request, including the OEM part number or VIN, to a network of suppliers simultaneously. Platforms like PartsSearch return multiple quotes with price, condition, and lead time, letting your team select and order without contacting each supplier individually.
What are the three main types of spare parts?
The three categories are OEM (original equipment manufacturer) parts made to factory specification, aftermarket parts made by third parties to equivalent or alternative spec, and remanufactured parts that are rebuilt to OEM tolerances. For any aftermarket or remanufactured option, verify spec (alloy grade, filter efficiency, pressure ratings) against the OEM part number rather than assuming cross-reference equals fit.
When should you escalate a parts lookup to a specialist?
Escalate when the EPC shows no serial-range match for your machine’s serial, when a part is discontinued with no supersession listed, or when diagrams are ambiguous and the part is high-value or safety-critical. A specialist lookup service collects machine details, confirms the correct part range, and prepares a verified purchase quote.